Introduction:
Minikube has revolutionized the way developers interact with Kubernetes by providing a local, lightweight cluster for experimentation, testing, and development. In this blog, we'll explore the power of Minikube and guide you through the steps to get started on your Kubernetes journey.
What is Minikube?
According to Minikube documentation - minikube is local Kubernetes, focusing on making it easy to learn and develop for Kubernetes.
Minikube is an open-source tool that enables you to run a single-node Kubernetes cluster on your local machine. It simulates a complete Kubernetes environment, allowing you to deploy, manage, and test applications without the need for a full-scale cluster. Minikube supports multiple platforms, including Windows, macOS, and Linux, making it accessible to developers across various operating systems.
Benefits of Minikube:
Local Development Environment: Minikube provides a dedicated environment for developing and testing Kubernetes applications. It allows you to iterate quickly, experiment with different configurations, and simulate complex multi-node clusters on a single machine.
Ease of Installation: Getting started with Minikube is a breeze. You can download the binary from the official Minikube website and install it with a few simple commands. The installation process is well-documented and tailored to different operating systems.
Setting Up Minikube:

To begin your Minikube journey, follow these steps:
Step 1: Install Dependencies: Ensure that you have a hypervisor installed, such as VirtualBox or HyperKit, as Minikube requires a virtualization solution to run the Kubernetes cluster.
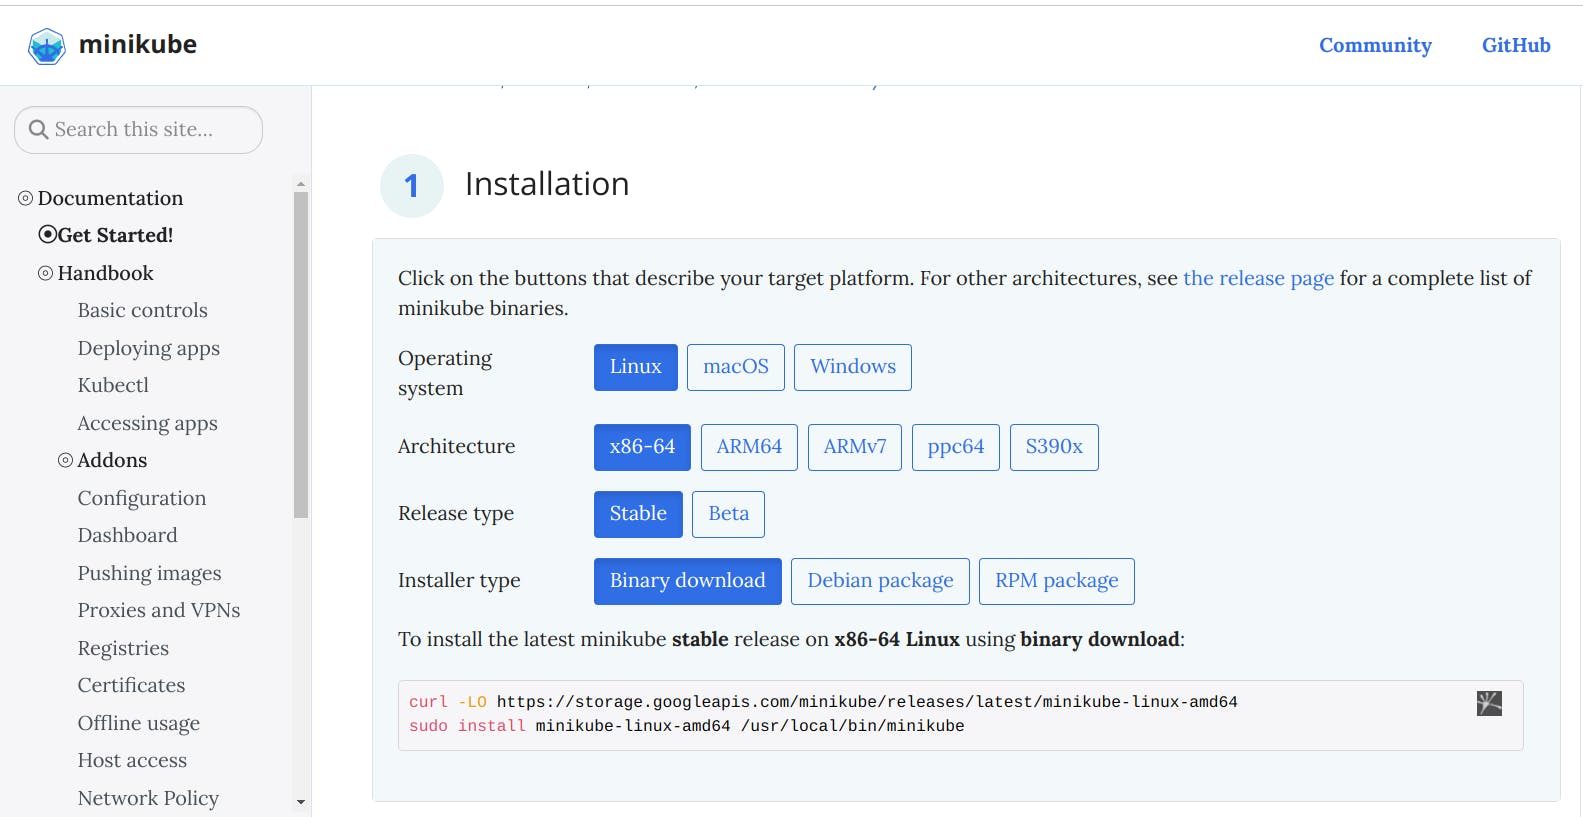
See the below image and make sure you download the right binary according to your Operating system architecture.
Head over to official minikube docs to learn more!

Step 2: Install Minikube: Download the Minikube binary for your operating system and install it following the provided instructions. Verify the installation by running minikube version in your terminal.
Step 3: Start Minikube Cluster: Launch your Minikube cluster using the minikube start command. This will create a single-node Kubernetes cluster on your local machine.
Step 4: Interact with Kubernetes: Once your cluster is up and running, you can start deploying and managing your applications using familiar Kubernetes commands such as kubectl create, kubectl apply, and kubectl get. Minikube sets up a context for your cluster, so you can seamlessly switch between local and remote Kubernetes configurations.
Tip - type minikube dashboard command in your terminal - you can able to see the dashboard in your default browser!

Exploring Minikube Features:
Storage and Networking: Minikube provides options to configure persistent storage and networking features, allowing you to test and experiment with different storage volumes, network policies, and service types.
Add-ons and Extensions: Minikube offers various add-ons and extensions that enhance your local Kubernetes environment. You can enable features like Kubernetes Dashboard, Ingress Controllers, Metrics Server, and more to extend the capabilities of your Minikube cluster.
Learning Resources:

To further enhance your Minikube skills, take advantage of the available resources:
Official Minikube Documentation: The official Minikube documentation provides detailed guides, tutorials, and references for different aspects of using Minikube.
Online Communities: Engage with the vibrant Minikube community through forums, discussion boards, and social media channels. Share your experiences, ask questions, and learn from fellow developers.
Blogs and Tutorials: Explore blogs and tutorials from Kubernetes enthusiasts and experts, which cover various use cases, best practices, and advanced techniques with Minikube.
Conclusion:
Minikube empowers developers to start on their Kubernetes journey with a local development environment that mimics the power and flexibility of a production cluster. By following the steps outlined in this blog, you can quickly set up Minikube and start exploring the vast possibilities of Kubernetes right on your machine.
Happy Kubernetizing with Minikube! ☸️
❤️Thank you very much for reading ❤️
If you find the blog useful don't forget to like, share, and comment.
If I miss out on anything feel free to comment
Feel free to comment your views in the comment section.
Connect with me on Twitter
Happy Learning 😊!